Ms. Marvel Update

I’m finally almost done with the bracer/cuff/whatever it’s called, and it’s time for an update!

I primed the bracer with gesso (I didn’t take a photo of that) because I already own a giant tub and it seemed silly to buy more.  Gesso is a primer normally used on canvases, but can be used on pretty much anything if you get creative.  I know I’ve used it on insulation foam before to make my giant Heavenly Sword blade.

20160609_154317

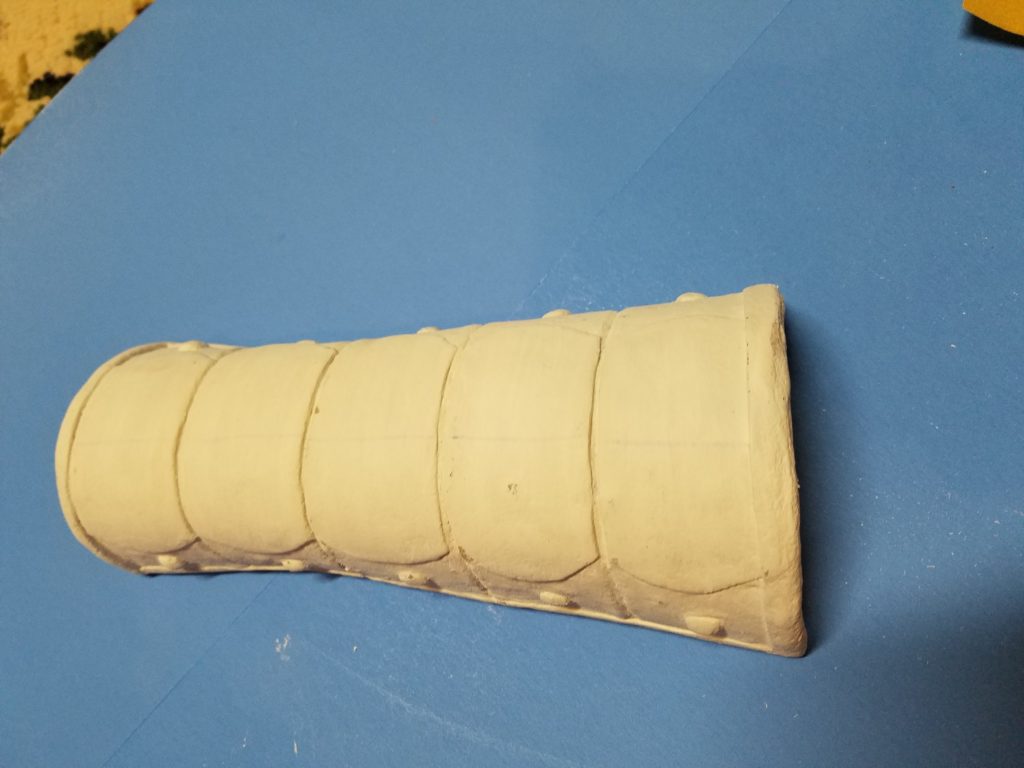
I think I applied 5 coats to it, possibly more by the time I was done.  I used a hairdryer (set on cool; don’t want to heat up the worbla) to dry each layer in between and then went in with fine sandpaper and smoothed it down.  I’m not going to claim that the end result was perfect; we’ll call it the “well loved” look and not the “I just bought this from a fancy jewelry store” look.

Spraypainted Bracer

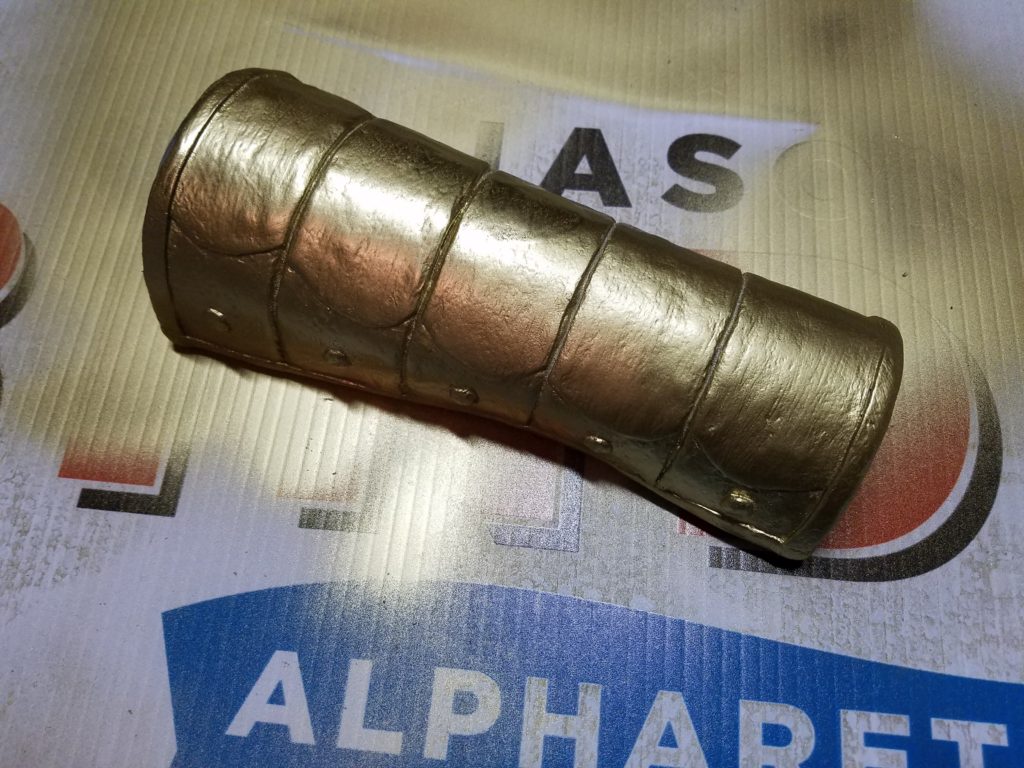
Once I got fed up with sanding, I took it outside and sprayed it gold using Krylon Premium Metallic spraypaint (from Joanns).  Handy tip: Political signs are fantastic to spraypaint on!  This one was a post election one (just so people don’t think I go around stealing signs off the road) that we had in the garage, and it’s nice because it’s sturdy yet small and I could pick the whole darn thing up and carry it inside without waiting for the paint to dry.

Lastly, I added the painted details.

Painted Bracer

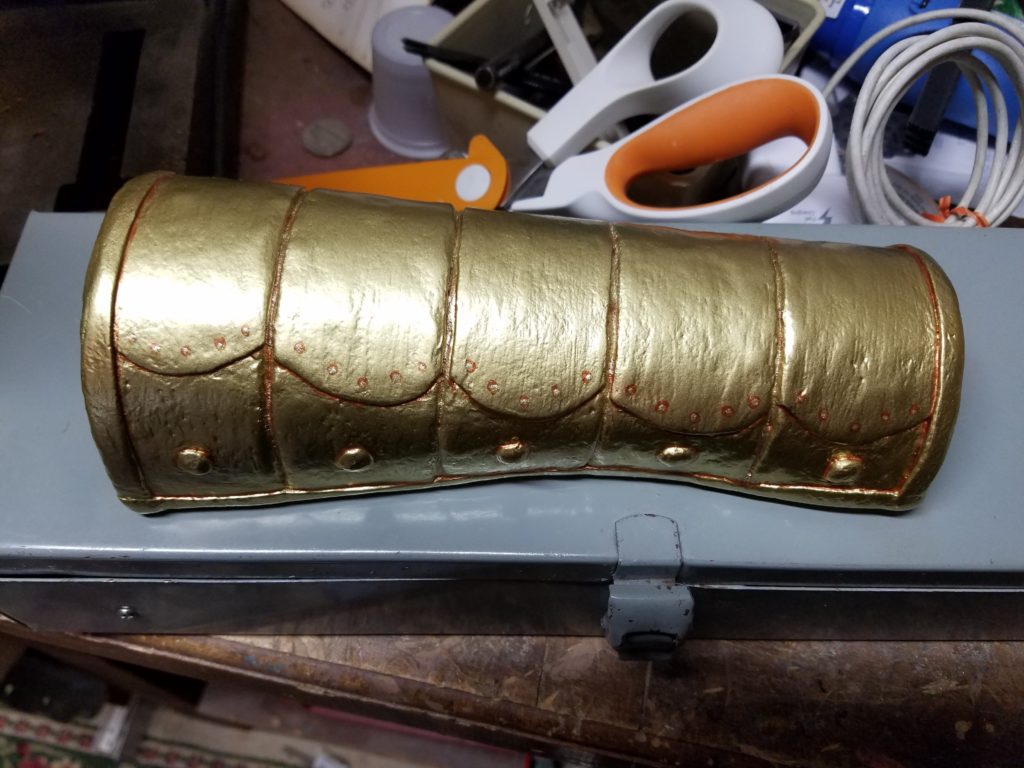
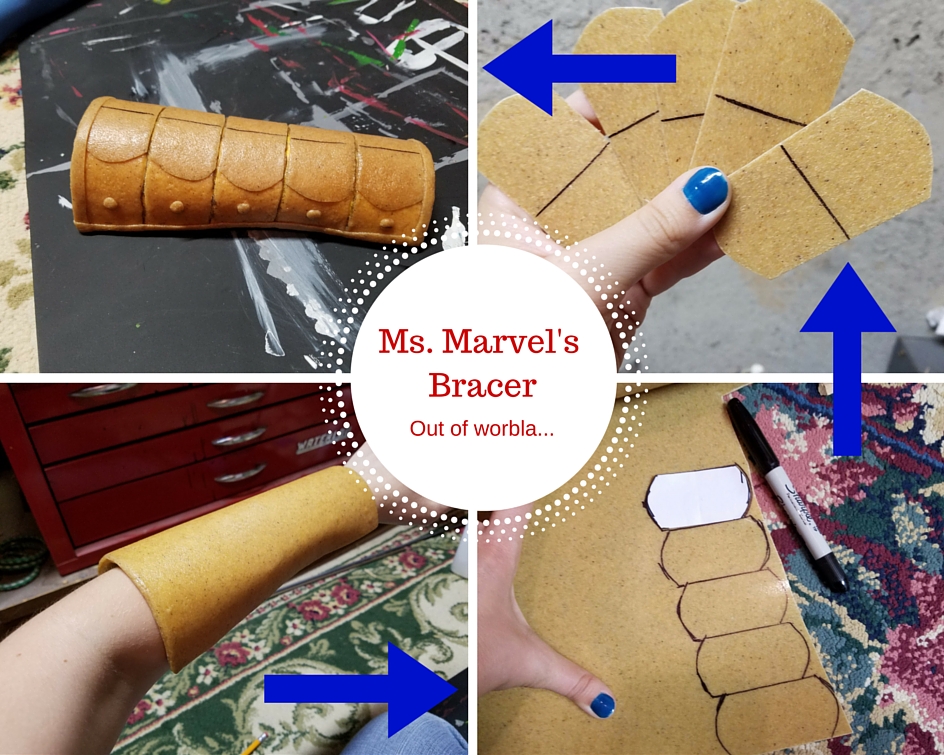
I want it to look as much like the pictures as possible, but I don’t want it to be very bulky because that will take away some of the authenticity of the piece.  The goal was for it to be smallish and fairly close to my skin.  I experimented with adding little beads of worbla for the upper dots, but couldn’t get them to not look cheesy.  I painted them instead, and while I know they don’t look like they’re popping off of the piece, I like how it turned out.  All I have left to finish for the top is to add the red rhinestones.

Underside of the Bracer

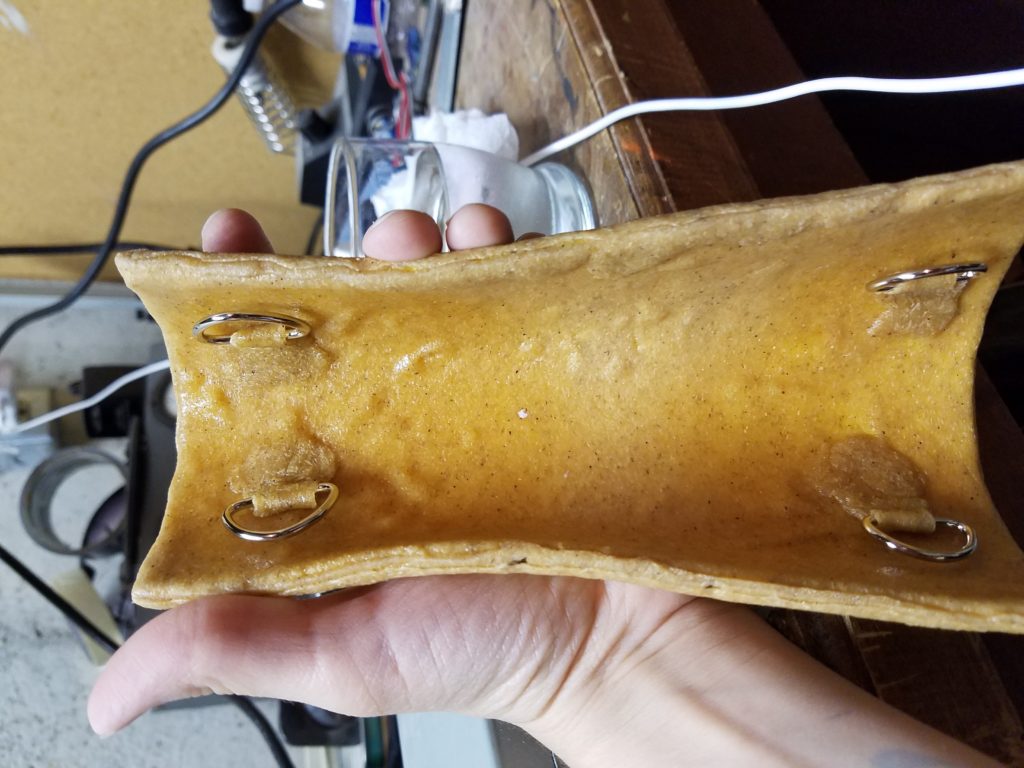
On the underside I’ve attached 8 D rings(only 4 pictured, I promise I can count).  To get them in you take a small fold of worbla, run it through the D ring and heat it up so that it folds over and sticks together.  You then heat the base part up (ie. the bottom of the bracer) cut it open, stick the D ring piece of worbla (which is hopefully still warm) into the hole you just made, and then close the whole thing up.

I’m still trying to work out how I’m going to make the bottom bracelet  part.  That’s most definitely going to be out of the 4 way stretch fabric because it needs to stick to my arm and not roll over.  So…give me till Wednesday and we’ll see what I’ve got.

Is anyone going to the random AWA event on Saturday other than Stephanie and me?  It’s $30 to get in and only $15 if you’re in cosplay.  Info is here if you’re interested!

Playing with Worbla for the First Time

Progress photos of a bracer made of worbla

Well, I didn’t manage to finish my costume for Momocon (to my supreme disappointment).  I got to this point where I probably could’ve finished it, but it wouldn’t have been completed to a standard that I was actually proud of (plus I would’ve gone to the convention half asleep from staying up all night), and so I decided to leave it for next time.

I’m almost done with so many parts of it.

  • The dress is almost complete save for the bottom hem and the collar.
  • The scarf is almost complete save for the funky starburst bits at the end.
  • The leggings and undershirt are complete (they could use a trip through a serger).
  • The bootcovers exist (they need buttons, soles, and hemmed at the top).
  • The bracer (obviously) needs painted and I need to make the stretchy bit for the bottom.
  • I have a leather mask now!  I bought it at Momo!

It’ll be done by Dragoncon for sure.  It was just too many things to finish in the past few weeks and everything that could possibly happen recently did happen.  Sometimes you just have to know when you’ve had enough.

I am rather pleased with how the bracer turned out, however.  I’ve seen a lot of worbla armor/props before but I’ve never actually played with it.  Worbla (for you non-cosplayers) is this funky plastic substance that can be heated up with a heat gun and molded into a variety of shapes.  Google it or go on youtube to find tutorials–there are a million out there.

There are some great cosplayers out there who have made fantastic things with it, and if you’ve never seen Kamui Cosplay’s  work before, you should absolutely check out her site to get an idea of what you can do with it.  I ended up buying her digital set of how to books ($25 for all 6) and after fully reading through two of them so far, I have no regrets about my purchase.  It instilled a bit of confidence in me before I started.  Plus it gave me a handy-dandy warning about how I was going to burn my fingers in the process, but it would be worth it.

I totally went to my guitar lesson today with burnt fingers.  It was fabulous.  My fingers hurt BEFORE playing.  Yay!

I’ll hopefully get the rest of the bracer done in the next few days, so I’ll put pics up when I do.  On Sunday (unless Sunday is crazier than Wednesday at the bookstore), I should have a new “painting” set put together for everyone to see that I made from these super funky canvases.  I’m pretty excited.  My fingers are covered in both worbla burns AND mod podge.  Hooray!

The Worbla’s Finest Art website (for those who have never seen it before).

And my Etsy Shop.  Because self promotion for the win!  Also, I’m going to have something new in the works soon.  Once I’m done burning myself with the heat gun!