DragonCon Recap

Ms. Marvel taking selfies with other superheroes

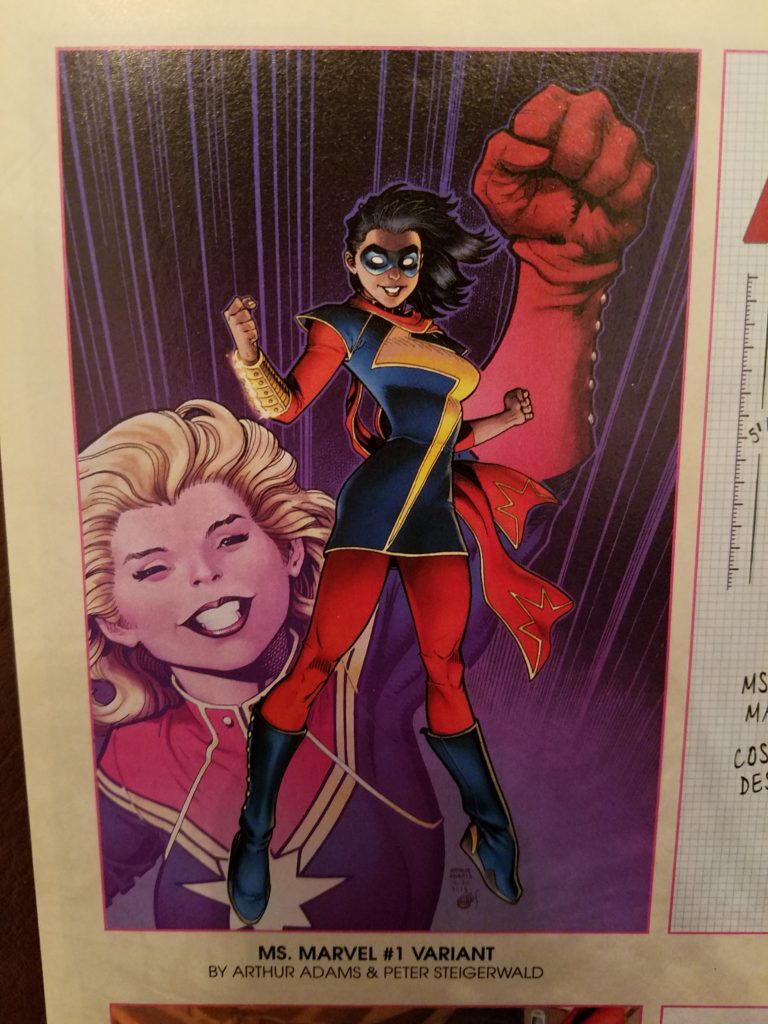
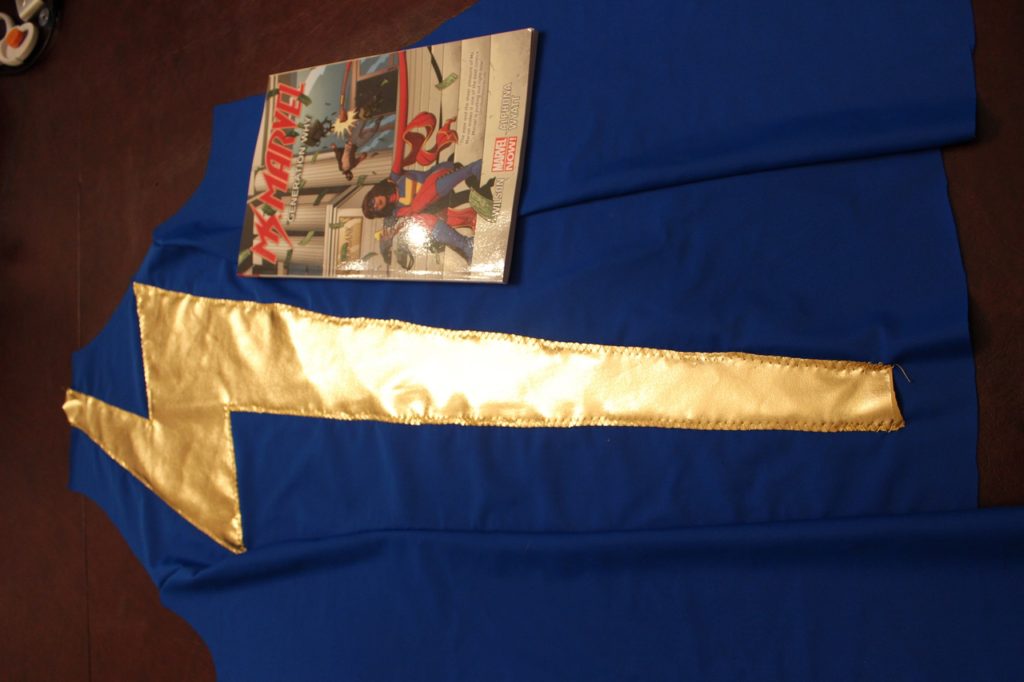
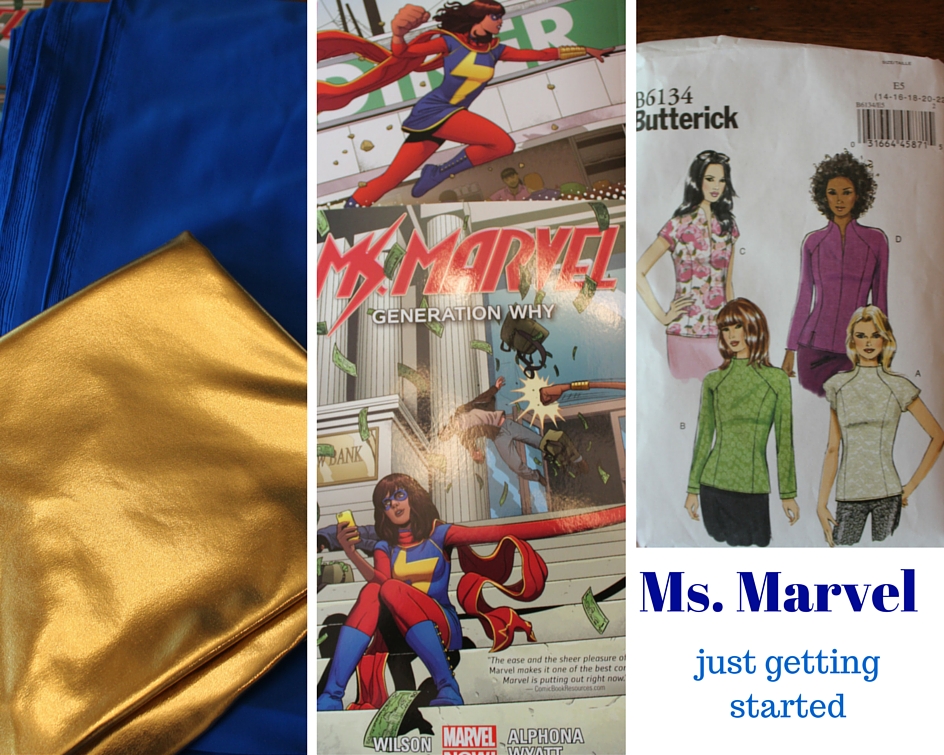
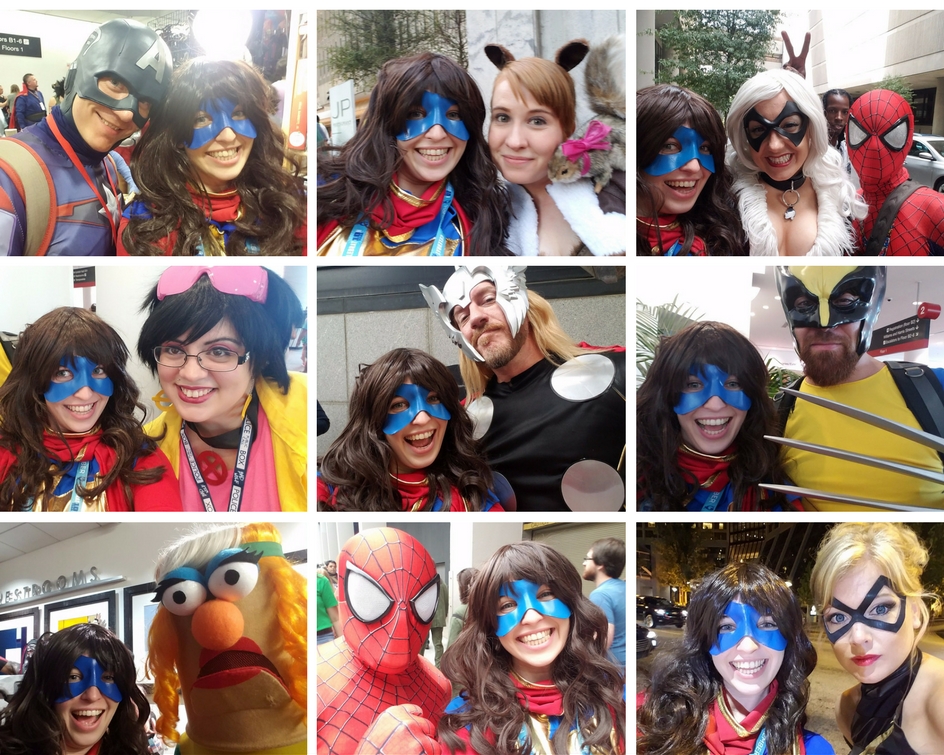
Check out all those superhero selfies!  I’m rather proud of them, really.  They were a boatload of fun to take.  I’ve got more that are slowly going up on Instagram (scribblerex), if you’re interested.  The selfies are a nod to the comics (if you haven’t read Ms. Marvel, go do that now!).  Kamala is a teenager and selfies are kind of her thing…also superhero fanfiction!

So…what happened at DragonCon?  Well, everything.  But I’m going to narrow it down to my favorite things or we’ll be here all day talking about pie, Katie’s sparkly shorts, Invader Zim, and how much I love watching people in giant mech suits try to fit through doorways.  So, my top 3:

1.Princess Alethea’s Traveling Sideshow

  • Basically a bunch of wonderful YA authors get together to put on a little…sideshow…?  There’s usually singing, storytelling (Tiny insignificant details!), and antics–like Leanna Renee Hieber turning her novel into a Hermione/Snape fanfic.  Other perks…well…if you’re one of the first people there you get some free swag…I love perks.  I also got Alethea Kontis to sign her newest Trixter novel for me, plus a collection of short stories.  And I picked up Mari Mancusi’s Tomorrow Land…zombies and Disneyland…I’m pretty pumped!  Who else was there?  Well…Gray Rinehart and S.J. Tucker brought their musical talents, and E.C. Myers played handsome prince.  The Traveling Sideshow has been hilarious both years we’ve went, and definitely worth setting aside an hour of your con for (especially you other YA fans out there).

2. The Canonization of Mother Teresa at Sacred Heart

  • Sacred Heart is about a minutes walk from the Hilton downtown, and I end up there for mass every DragonCon.  This year had an added bonus: Mother Teresa was actually canonized on September 4.  Luci and I went to the 6:00 mass for the fancy celebration of it–there were TV cameras and everything.  I can’t find a good article about the mass itself (everything online predates the actually mass, so that’s unhelpful), but this Georgia Bulletin article (the Catholic newspaper) tells you a bit about the Missionaries of Charity in Georgia.

3. Robot Battles

  • I love Robot Battles.  It isn’t quite like what you’ll see on Battlebots on TV.  Robot Battles are held sumo style on a little platform where the robots compete to see who can knock the other one off first.  Michael and I have looked forward to it every year since we first discovered it and it never disappoints.  One day I want to build my very own.  Check out their facebook page for info–I learned that they have a youtube channel as well, if you want to actually watch a battle and see what I’m talking about.  They have the rumbles up (they put all of the robots up on the stage at the same time and have them go at each other)…and I swear one of them probably has video of Kelly Lockhart whacking the bots with a wooden duck…

So…that’s it…that’s all that happened minus A LOT!  But you’ll just have to go with me next year and pick some favorites yourself.  Tickets for next year are still $80 (I just checked…but that could change by the time I hit post), so get ’em while they’re cheap!

————————————–Later in the day edit—————————————-

It’s been a rather heavy day, so I’m moving the heavy part of my post down here…

I feel a little weird about posting on 9/11.  I went to mass this morning and realized that 15 years have passed…how could it have?  America the Beautiful made me tear up a little…which is ok…so here are a few hopes for you today.  I hope everybody gets to take a moment today to remember.  I hope everyone takes a second to send out a prayer for those who lost their lives or loved ones during the attacks.  Be thankful for our country, and our loved ones, and our many brave heroes.


Finishing Up Ms. Marvel’s Scarf

Ms. Marvel update!

I started on the scarf…the tedious part.  You don’t want to know how long it took me to put the trim on just the edges; I knew adding the funky starburst bit was going to make me want to cry.

Ms. Marvel Comic

Instead of crying, I chose to flail my arms in the air.  Sometimes Michael flailed back.  It was a thing.

Ms. Marvel Stencil

So…to make my life easier I made a weird looking stencil.  (no I don’t remember why it looks that weird…I made it back in June, just never got around to using it).

20160820_173908

Then I traced it with a fabric marker so it would wash out (not that you’re actually going to see it).

Funky shape pinned

And then I pinned one side, sewed one half of the line and then flipped it over to pin the other.  It was moving way too much to risk trying to pin both sides and then sew.

Finished scarf end

The end result looks like this…I wish it didn’t look quite so much like snakeskin, but it looks fine from a distance, so I’ll deal.  Stephanie says it looks good and I’m being too nitpicky.  She’s right.  My nitpicky side is very resentful of her being right, but she’s right.

Michael with a Stick

Lastly, I’ll leave you a photo of Michael with a stick.  We took a brief break to go Pokemon hunting, and Michael found a stick.  Also, I realize I’m playing the WordPress lottery with photos here, and that this photo–the entirely unrelated one–will be the one that shows up on facebook.  Bring it on, WordPress.  Bring it on.


Ms. Marvel Update

I’m finally almost done with the bracer/cuff/whatever it’s called, and it’s time for an update!

I primed the bracer with gesso (I didn’t take a photo of that) because I already own a giant tub and it seemed silly to buy more.  Gesso is a primer normally used on canvases, but can be used on pretty much anything if you get creative.  I know I’ve used it on insulation foam before to make my giant Heavenly Sword blade.

20160609_154317

I think I applied 5 coats to it, possibly more by the time I was done.  I used a hairdryer (set on cool; don’t want to heat up the worbla) to dry each layer in between and then went in with fine sandpaper and smoothed it down.  I’m not going to claim that the end result was perfect; we’ll call it the “well loved” look and not the “I just bought this from a fancy jewelry store” look.

Spraypainted Bracer

Once I got fed up with sanding, I took it outside and sprayed it gold using Krylon Premium Metallic spraypaint (from Joanns).  Handy tip: Political signs are fantastic to spraypaint on!  This one was a post election one (just so people don’t think I go around stealing signs off the road) that we had in the garage, and it’s nice because it’s sturdy yet small and I could pick the whole darn thing up and carry it inside without waiting for the paint to dry.

Lastly, I added the painted details.

Painted Bracer

I want it to look as much like the pictures as possible, but I don’t want it to be very bulky because that will take away some of the authenticity of the piece.  The goal was for it to be smallish and fairly close to my skin.  I experimented with adding little beads of worbla for the upper dots, but couldn’t get them to not look cheesy.  I painted them instead, and while I know they don’t look like they’re popping off of the piece, I like how it turned out.  All I have left to finish for the top is to add the red rhinestones.

Underside of the Bracer

On the underside I’ve attached 8 D rings(only 4 pictured, I promise I can count).  To get them in you take a small fold of worbla, run it through the D ring and heat it up so that it folds over and sticks together.  You then heat the base part up (ie. the bottom of the bracer) cut it open, stick the D ring piece of worbla (which is hopefully still warm) into the hole you just made, and then close the whole thing up.

I’m still trying to work out how I’m going to make the bottom bracelet  part.  That’s most definitely going to be out of the 4 way stretch fabric because it needs to stick to my arm and not roll over.  So…give me till Wednesday and we’ll see what I’ve got.

Is anyone going to the random AWA event on Saturday other than Stephanie and me?  It’s $30 to get in and only $15 if you’re in cosplay.  Info is here if you’re interested!

Playing with Worbla for the First Time

Progress photos of a bracer made of worbla

Well, I didn’t manage to finish my costume for Momocon (to my supreme disappointment).  I got to this point where I probably could’ve finished it, but it wouldn’t have been completed to a standard that I was actually proud of (plus I would’ve gone to the convention half asleep from staying up all night), and so I decided to leave it for next time.

I’m almost done with so many parts of it.

  • The dress is almost complete save for the bottom hem and the collar.
  • The scarf is almost complete save for the funky starburst bits at the end.
  • The leggings and undershirt are complete (they could use a trip through a serger).
  • The bootcovers exist (they need buttons, soles, and hemmed at the top).
  • The bracer (obviously) needs painted and I need to make the stretchy bit for the bottom.
  • I have a leather mask now!  I bought it at Momo!

It’ll be done by Dragoncon for sure.  It was just too many things to finish in the past few weeks and everything that could possibly happen recently did happen.  Sometimes you just have to know when you’ve had enough.

I am rather pleased with how the bracer turned out, however.  I’ve seen a lot of worbla armor/props before but I’ve never actually played with it.  Worbla (for you non-cosplayers) is this funky plastic substance that can be heated up with a heat gun and molded into a variety of shapes.  Google it or go on youtube to find tutorials–there are a million out there.

There are some great cosplayers out there who have made fantastic things with it, and if you’ve never seen Kamui Cosplay’s  work before, you should absolutely check out her site to get an idea of what you can do with it.  I ended up buying her digital set of how to books ($25 for all 6) and after fully reading through two of them so far, I have no regrets about my purchase.  It instilled a bit of confidence in me before I started.  Plus it gave me a handy-dandy warning about how I was going to burn my fingers in the process, but it would be worth it.

I totally went to my guitar lesson today with burnt fingers.  It was fabulous.  My fingers hurt BEFORE playing.  Yay!

I’ll hopefully get the rest of the bracer done in the next few days, so I’ll put pics up when I do.  On Sunday (unless Sunday is crazier than Wednesday at the bookstore), I should have a new “painting” set put together for everyone to see that I made from these super funky canvases.  I’m pretty excited.  My fingers are covered in both worbla burns AND mod podge.  Hooray!

The Worbla’s Finest Art website (for those who have never seen it before).

And my Etsy Shop.  Because self promotion for the win!  Also, I’m going to have something new in the works soon.  Once I’m done burning myself with the heat gun!

Ms. Marvel: Applique on 4 Way Stretch

This was a challenge.

And not necessarily a fun sort of challenge, more of an uggggg I’m going to have to do this by hand challenge.

Good news is that I figured it out without resorting to hand-sewing.

So, the first thing I did was pin the lightning bolt down.  That part was easy.

MsMarvelbeginning0014

But then, how to get the stupid lightning bolt to stay where it is and not stretch or bulge or go all over the place?  I pulled out my handy dandy scrap of fabric (I’m feeling very Blues Clues this morning), and gave it a test run, adding in a zig zag stitch and just using my normal foot.  It worked with the side seams for the dress, didn’t it?

Well, that gold stuff, as it turns out, is kind of sticky so that didn’t work at all.  It stretched, it bubbled, and just no.

So then, I started looking up videos and found one that said that I could solve the problem by placing tissue paper under my applique.  Under I could do.  I needed to see on top so that I could make sure my seam was placed correctly on the applique.

MarvelAppliquewwords

It didn’t work.  Granted, the feed dogs weren’t getting stuck on the fabric, the top of the gold was and I needed to be able to see that.  Also this:

Toilet paper caught in a seam

(Terrible photo, I know.) And in the end, neither one of my seams looked remotely nice.

So I tried the one thing that I probably should have done to begin with: I got out my walking foot.

For those of you who don’t know a thing about sewing machines, walking feet are really freaking adorable.  They’re normally used in quilting when you’re sewing a kajillion layers plus batting all at the same time.  In action they act like teeny tiny kangaroos.  I don’t think I’ve ever heard of anyone recommending to use one for clothing before; but in this case, you should definitely give it a shot.

Why? Instead of the foot sliding over your fabric and causing it to bunch up, the walking foot hops up and down as it moves.  In other words, no bunches.
MarvelApplique0020

It worked amazingly, and the only excuse I have for trying toilet paper before walking down a flight of stairs to go get it is that I was feeling very lazy and the bathroom was much closer than downstairs.

MarvelApplique0021

While I realize that not everyone in the world is going to want to invest in a new sewing machine foot just for one project, I’d highly recommend having one of these little guys around.  They’re surprisingly useful at the oddest of times, and they’re really not too expensive.  I believe the one for my Husqvarna only cost $25 and it’s saved me so many headaches.  Plus–did I mention–that I think they’re cute?

So that’s my solution.  I’m sure there are other ways to go about it, but for me this solved the problem in an easy way that actually looks nice and I didn’t have to rip out any of my seams (which wouldn’t be fun on this fabric–there would be so many holes!).

Next up: piping!

Other posts in this series:

Ms. Marvel: Working with 4-Way Stretch for the First Time

Ms. Marvel: Working with 4-Way Stretch Fabric for the First Time

This post is both an update on my Ms. Marvel costume, and a review of the Yaya Han fabric all at the same time.  Oh, and a tutorial on how to get started with 4-way stretch fabric if you’re as clueless as I was…yesterday.  Although, as I’ll be doing several weird things with the Yaya Han fabric (besides just sewing it together) this “review” is probably going to stretch for more than one post so I’ll link them together as I go.

It was suggested that I do a bit of research on how to sew 4-way stretch fabric before I actually start the project and risk messing up my nice fabric.  I wasn’t worried at all about sewing it before I did the research.  And then I figured out how many different bad things might happen to my nice fabric if I did something wrong and all of a sudden I was a bit of a nervous wreck.

People who commonly sew on 4-way stretch seem to have 1 main piece of advice:

Use a serger.

I technically have a serger.  When we were little, my mom was afraid my brother was going to slice his fingers off with it (a reasonable concern, having known Greggy his entire life).  So it’s been living in a box for roughly 30 years.  Thanks Greg.

This left me with one option: my little Husqvarna.

It is completely possible to sew 4-way stretch on your normal sewing machine, and the normal old YaYa Navy Blue 4-way stretch (the $20 one, not the $40) gave me absolutely not trouble on it.  (The gold is another story).

5 Things you can do to (try and) guarantee success with 4 way stretch fabric:

  • Use a stretch needle. I’m not certain that I understand all of the technical details that make these little guys work, but they’re designed so that you don’t skip stitches while sewing on stretch fabric.  I picked up a pack of Schmetz needles at Joann Fabrics.  You can get them on Amazon if you’re so inclined.
  • Change the tension on your machine. You want to make sure that the thread will also stretch with the fabric, and making it looser helps with this.  Most recommendations I read said to put it on 2 or so.  That worked just fine for me.
  • Use a stretch stitch or a zigzag. I used C or P on my machine, which isn’t a total zigzag, but the little extra stitches that go inward on them were just enough to keep the stretch I needed.  A full zigzag is supposed to keep more stretch, but then your seam is going to look funky. Stitch Options
  • Don’t use cotton thread. Apparently it breaks more easily.  I don’t know if I actually followed this one with the blue, as I used a spool of thread that I already had and it no longer had stickers on it to tell me what it was.  But I’ll add it in my list anyway as it sounds important.
  • Pull gently on the fabric as you feed it through the machine. This will keep it from bunching up.  Gently is the key here.  If you pull too hard it will also bunch.  Just in a different way than if you don’t pull.

MsMarvelbeginning0005

Go slow and do a test on some scraps before you use your actual pieces.  That way you can tell what’s happening with your fabric as it happens, and figure out how to correct it before you start on your actual pattern pieces.

MsMarvelbeginning0014

I had no problem putting together the front of the dress.  So, just considering that I’m happy with the fabric so far.  The gold is proving a bit trickier than the blue, however, and the fact that I can’t iron it isn’t making me feel any less…annoyed with it…so we’ll see if I my happiness doesn’t swing towards angry frustration by the time I’m done working on the appliqued lightning bold.

Next post!  Applique with 4-way stretch!  Huzzah!

Oh, and in case you missed it, I’ve got new coloring bookmarks up on Etsy!  They’re flowers. Check them out, buy a set, make me insanely happy for at least 24 hours.  Sometimes longer.  You know, whatever!

Ms. Marvel: Just Getting Started

Blue and gold fabric, Ms. Marvel Comics, Butterick Pattern

With only a month and a half left until Momocon,  I decided to finally break down and buy (part of) the fabric that I need for Ms. Marvel.  I went with the Ya-Ya Han fabric from Joann, not because I really wanted to buy her fabric, but because I really liked the gold and the blue matched the texture of the gold where the other blue that I liked better looked kind of funny next to it.  The Ya-Ya fabrics are very smooth, and it looks odd when you put a fabric where you can clearly see the grain next to one where you really cant…so…decision made.

No idea yet what I’m going to use for the red, but the dress itself needs to be completed before I bother with the scarf/undershirt/leggings.  so I’ll deal with that later.  Plus, I’d like to see if I actually like the Ya-Ya fabric before I invest in more of it.

The shirt patterns are for the dress.  I’m going to use a combo of the A body and C sleeves, and lengthen them to make the dress. (Though technically it’s a burkini! It’s a swimsuit! That’s a real thing, I Googled!)  Pretty excited about this one; I’ve been seriously fangirl-ing over this character recently.  Issues 3 and 4 just showed up at my door yester-afternoon and I’m slowly savoring them as #5 wont be out till the summer.

In other news, Appen News finally published the article–> here

It isn’t what I’d call good, but it does exist.

If you popped by my website thanks to the article, thank you for stopping by!  We haven’t gotten the print version on our driveway yet, but it should land in the next day or two.

And now, to clarify about the article: the title of it is such a great exaggeration that I can’t even call it an exaggeration.  It’s more of a I don’t know…mistruth?  I am a pretty good cosplayer(not to toot my own horn, but hoooonk!), and my current cosplays will go up on my blog which is my “business.” But somehow when I told the journalist that I was an a blogger/preschool music teacher/tutor/bookseller with two English degrees and a 50,000 word manuscript in the works, she interpreted that to mean that I actually ran a “Successful Cosplay Business.”  No idea.  I’m honestly sitting here looking at the word document I sent her in response to her questions, trying to figure it out; however, she seems to have made that leap on her own.  Since the original article (the one that started all this nonsense) was on the costumes Stephanie and I made for the GNFCC Expo (which we made to get a little publicity), maybe she thought that I was making costumes because I ran a business?  I really have no idea.  Stealing is still wrong, though, Appen News.  Period.

I apologize for anyone sorely disappointed to find out that I do not run a “Successful Cosplay Business”, but I do run a really nice blog and have a really nice Etsy shop with a brand new banner that everyone should go check out right now!  And then you should all buy my coloring bookmarks because they’re cute.